Cook Club: Before the Food Gets Cold
Hello! Last June (2025), I decided to start a cooking club with my friends as a way to stay connected as we all live apart now. From previous experience of running a club in university, I know how easy it is for action to fizzle so I really wanted to structure this 9-month group activity in a way that everyone could stay engaged for a long period of time.
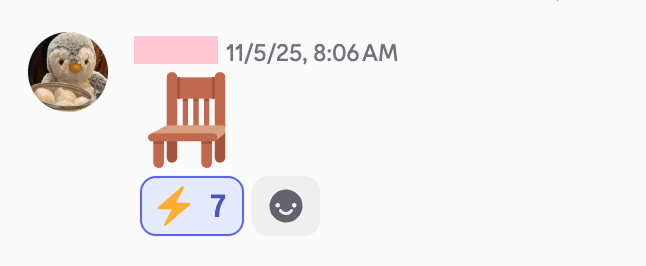
How it works is that each month, one person would be randomly picked to choose a recipe and the rest of us would all cook it remotely. If someone missed cooking, they would have to send a chair emoji in our more public server, and everyone else was required to react with the lightning emoji to “electric chair” then. Very intense right haha!!
And to make things more memorable and increase emotional investment, at the end I wanted everyone to work together and each create a monthly graphic spread that could then be added and printed out into our final magazine.
This cook club opened up so many experiences for me, so I wanted to write out this blog post to break down some of the more cool things I made for this cook club!
Huehuebot: My Discord Cooking Club Bot
Early in the first month, I spent time thinking about how to manage the social dynamics of running this club with a large friend group without coming across as naggy. While I was doing most of the organizing, I still wanted a more participant-oriented image. To do this, I decided to use a Discord bot to act as a neutral authority. Because there were frequent announcements to make, the bot handled tasks like selecting the recipe picker of the month and announcing everyone’s choices. Having these responsibilities managed by a bot made the process feel more official and consistent, while also removing the pressure of communication from any one person.
It actually ended up being pretty straightforward to write the code for this bot on our small private server, as the Discord API clearly defined how the command handlers should be structured. I ended up coding the main recipe picker commands, as
well as a few extra ones that I thought might be useful: /help, /random number, /rock paper scissors(two users can play
rock paper scissors synchronously), /select recipe picker (input a list of users to select from and randomly choose
one), and /announce recipe (which includes an optional link parameter).
Here's the code snippet of /select recipe picker
# Python
# Select recipe picker command
@command(name="selectrecipepicker", description="Randomly select next month's recipe picker")
@app_commands.describe(users="Mention all potential pickers (separate with spaces)")
async def pick_recipe_chooser(interaction: discord.Interaction, users: str):
    mentioned_users = [
        interaction.guild.get_member(int(user_id))
        for user_id in re.findall(r'<@!?(\d+)>', users)
        if interaction.guild.get_member(int(user_id))
    ]

    if len(mentioned_users) < 2:
    await interaction.response.send_message( "Please mention at least 2 users! Example: `/selectrecipepicker @shushu @mimi @cheucheu`", ephemeral=True )
    return

    # Get NEXT month
    next_month = get_next_month()
    month_year = next_month.strftime("%B %Y")

    chosen_one = random.choice(mentioned_users)

    # Format participant list
    participants = ", " .join([user.mention for user in mentioned_users])
    embed = discord.Embed(title=f"{month_year}'s Recipe Picker", color=0x8ee386 )

    embed.add_field(name="🥳 Woo!" , value=f"{chosen_one.mention} was chosen!", inline=False )

    embed.add_field(name="Drawn Between" , value=participants, inline=False )
    embed.add_field( name="" , value="🌟 Please make your submissions by the first of the month 🌟" , inline=False )

    cooking_emoji=bot.get_emoji(1385728587629330473) # Custom server emoji ID
    if cooking_emoji:
        embed.set_thumbnail(url=cooking_emoji.url)

    await interaction.response.send_message(embed=embed)
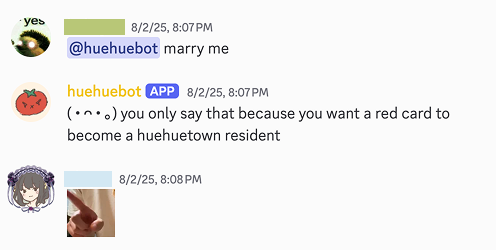
Lastly, I also added a few Easter eggs using fuzzy string matching like this:
However, once I finished coding, I realized there was one major thing I had overlooked: the bot could only run if I was running the program on my computer. This wasn’t ideal because I didn't want to leave my laptop on. So I first looked into online 24/7 code runners, but many of the free options wouldn’t allow me to upload environment variables separately, which I felt was a security concern (always practice safe coding guys!).
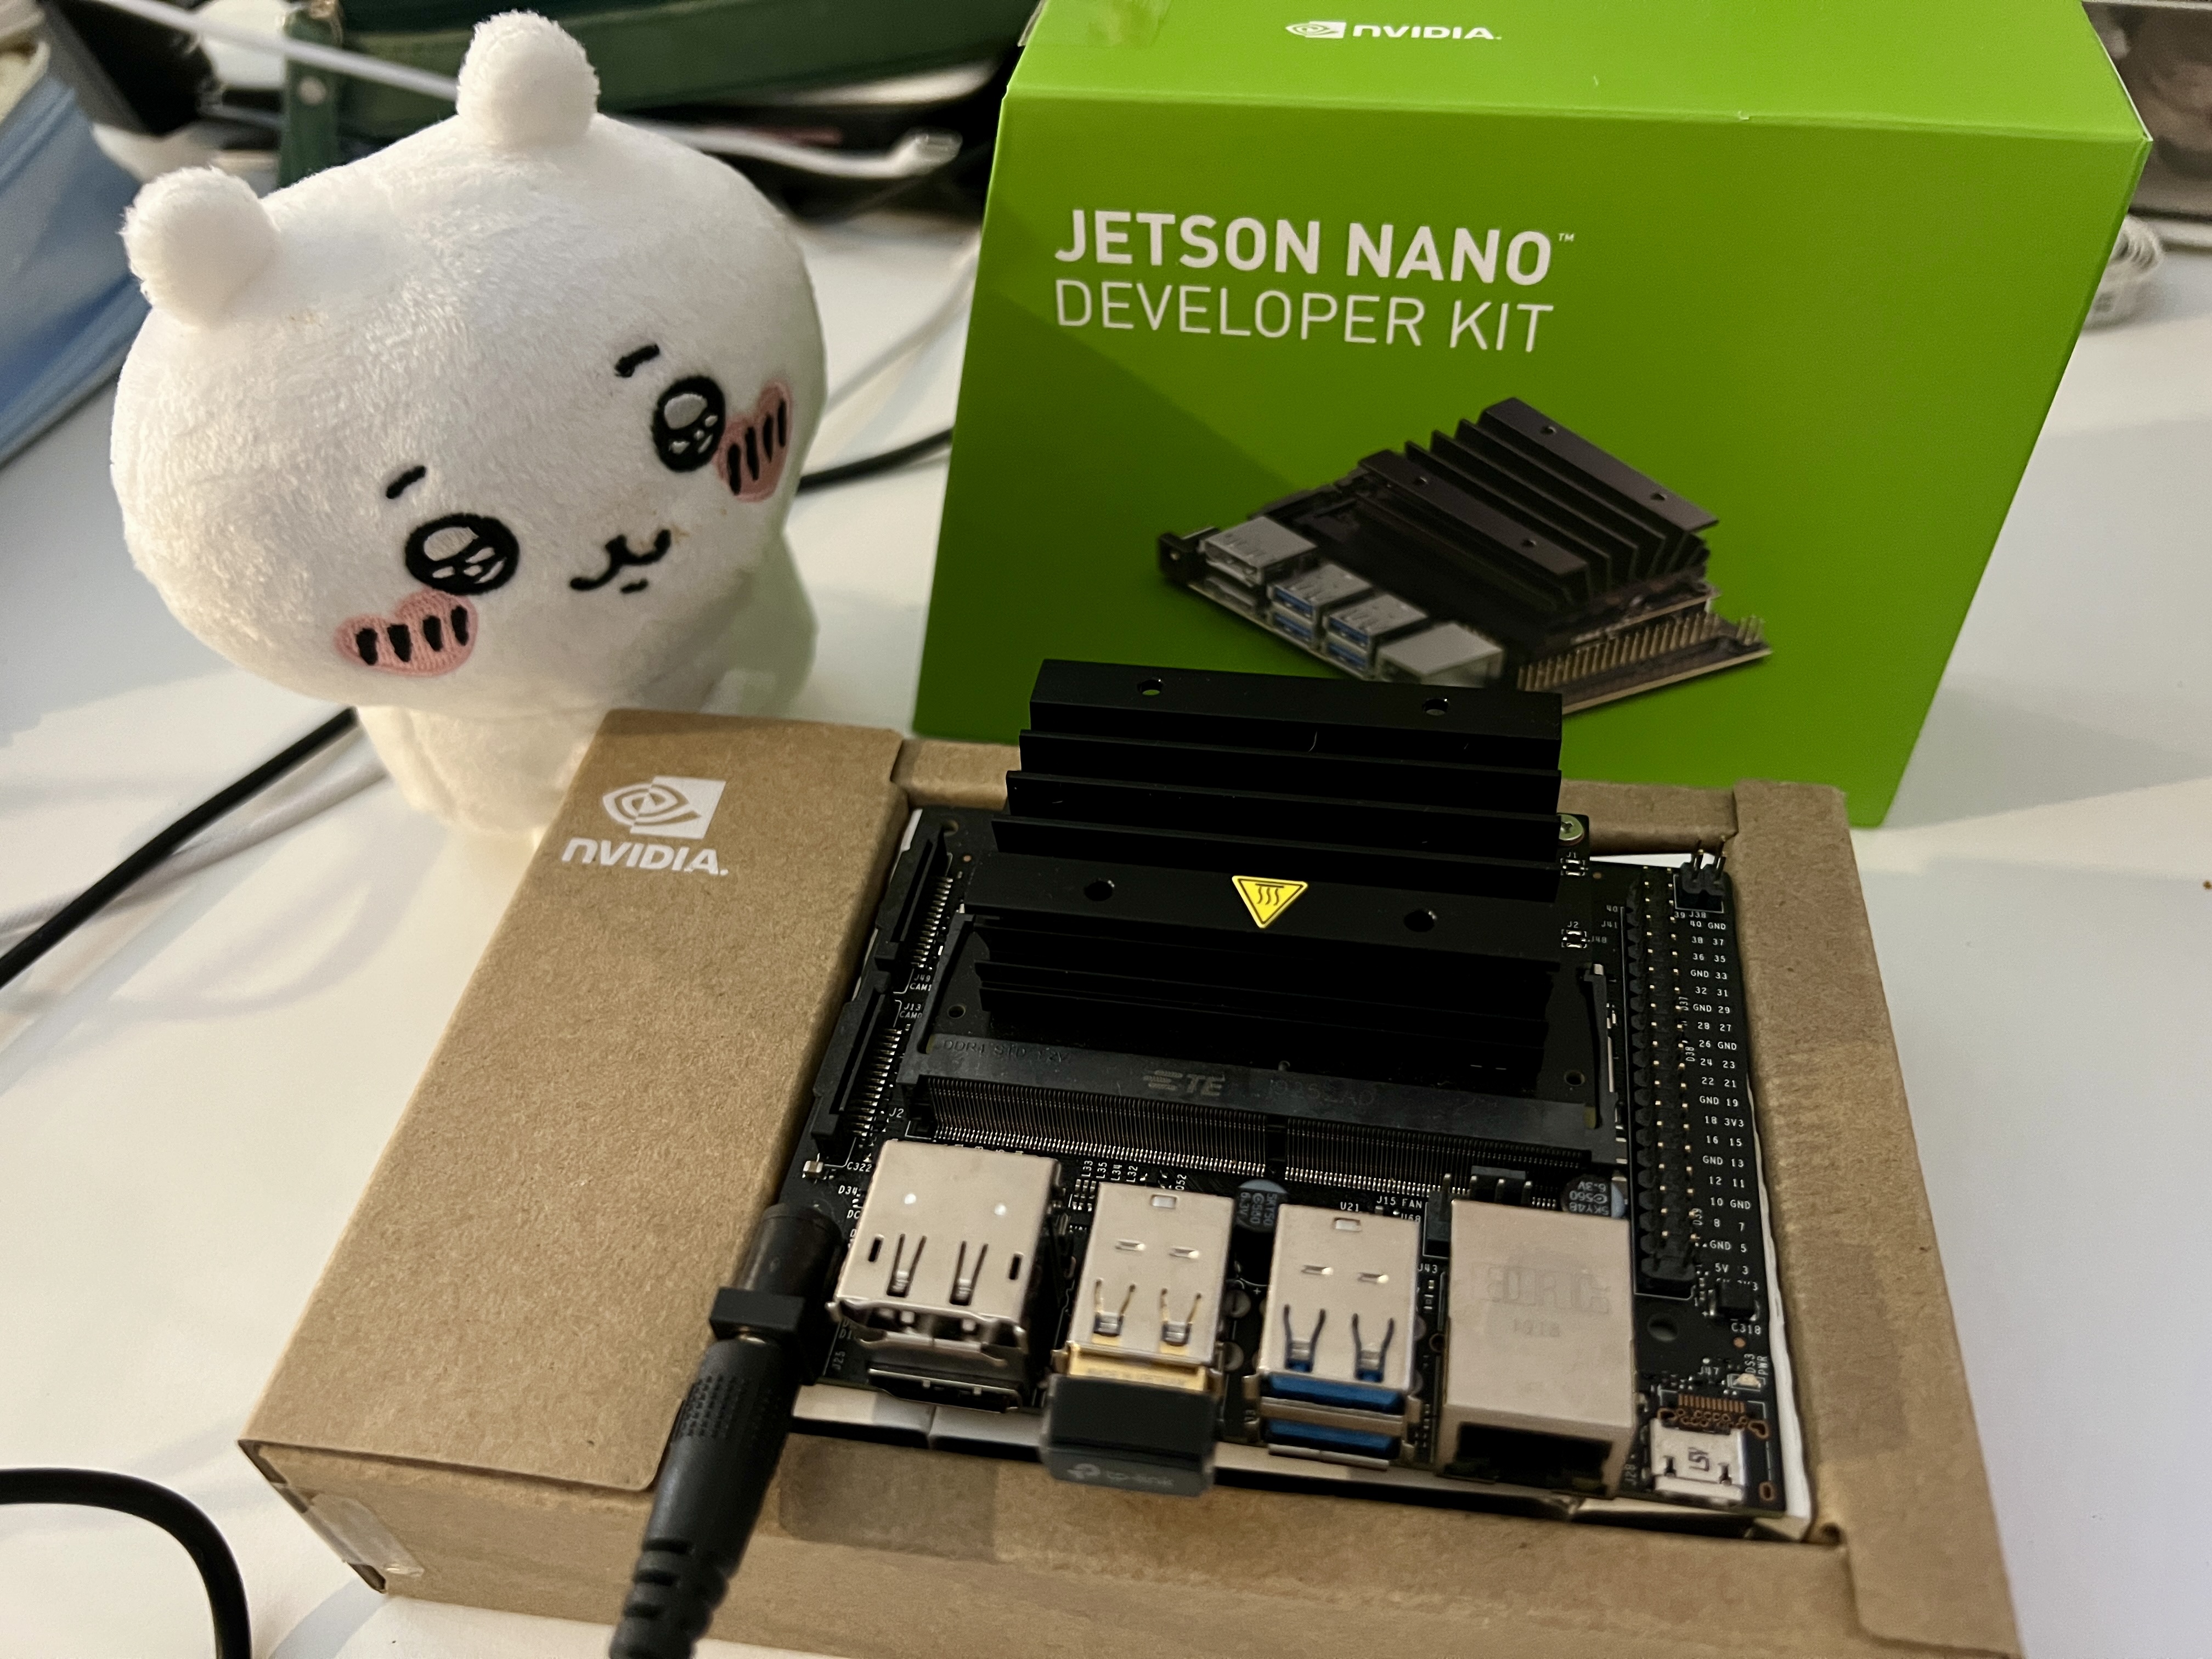
This led me to consider using a Raspberry Pi to run the Python bot, since it’s not very energy-intensive. I didn’t have a Raspberry Pi on hand, but I did have an unopened NVIDIA Jetson from a year ago. Yeah... a little overkill haha. Still, I managed to upload my code and get it running. Unfortunately, this also ended up not being an ideal solution, since I noticed that the Jetson tends to get hot easily. Even though it has its own thermal throttling, I think that if anyone wants to attempt this, it’s worth considering a cooling fan or just a Rasberry Pi. Unfortunately, my main workaround was to try not to leave the Discord bot running for long periods of time, so I don’t come home to a burnt-down house one day (I don't know if that can't really happen, but I'm paranoid).
Designing the Cook Club Magazine
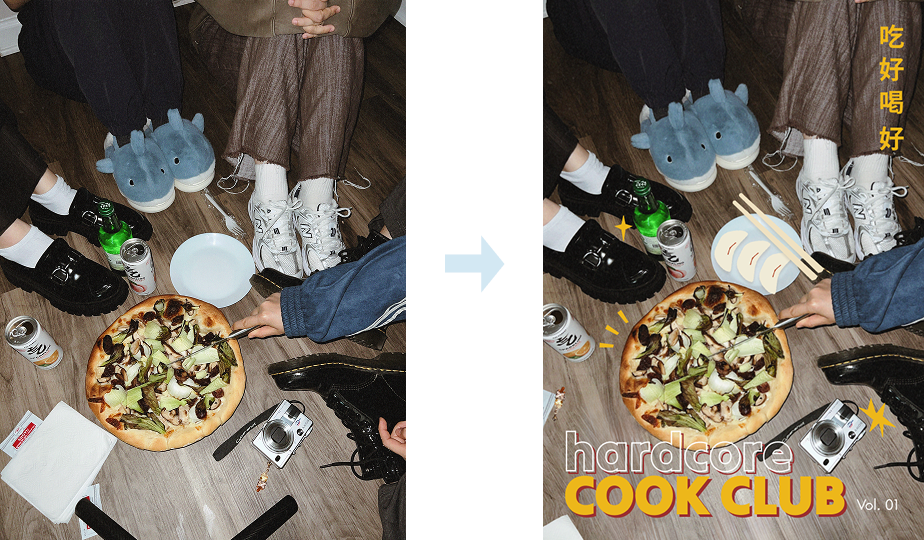
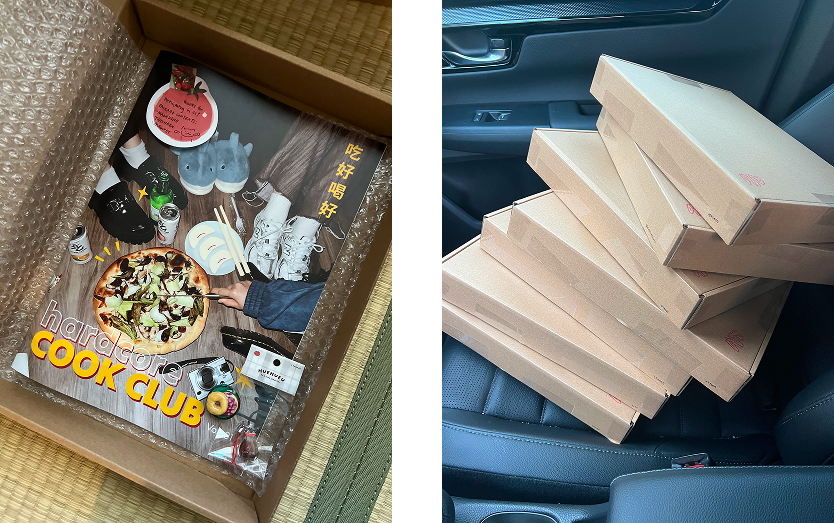
As I mentioned, one of the main activities for our cook club was centered around creating a magazine. Notably the cover page needed to set the overall tone and express the idea of what the club meant, which to me was centered around friendship and connection. For the cover, I wanted to capture an image that felt nonchalantly cool, a bit chaotic and youthful. We shot it with flash to recreate a more nostalgic, unpolished, and casual atmosphere. Although at the time of taking this image I really only had this feeling of what I wanted, I can now logically explain about why I wanted this vibe so bad. And I think it’s because in the 2000’s it often felt like people were documenting the sporadic moment rather than the polished curated feel most images have today.
The key feature of this picture is the four different pairs of shoes, with drinks and pizza scattered across the ground. The different shoes represent our uniqueness in oneself, while the pizza on the ground (don’t worry there is a plate underneath), made with bok choy, Chinese sausage, scallion oil, and shiitake, adds a sense of informality and references our Chinese background. This ended up being one of my favorite pictures we took! I really liked how the variety of shoes drew attention to each person, while the focus on the food was still present. The way the final editing integrated 2D elements also added a cool effect! By the way the pizza was delicious too.
Also, quick comment, Adobe Photoshop’s generative expand, magic heal, and subject select are crazy good! It only took a few clicks to get everything the way I wanted it to look. I highly recommend using it!
As we started putting together the monthly graphic designs in Figma, I realized that nine pages of content felt a bit thin. More importantly, the magazine felt like it was missing the essence of the actual members who made up the club. While food photography was important, I felt it was equally important to capture each person's individuality and thoughts as well. And so, I asked each member to contribute a page related to food and their interests, to further foster that sense of shared idea and community.
Everyone did a great job with this and had a lot of unique ideas! For example, one member wrote a two page love story and another even wrote a rap song haha. It was really exciting for me to see everyone's own take on the project.
I also want to highlight the work I did for the back cover. As someone who is Chinese American, I was drawn to the idea of using fortune cookie slips and a Chinese takeout receipt, as both signal that something has come to a close. In this case, it gave me a good way to summarize everything we cooked throughout the month.
Each fortune cookie slip on the page is also customized and representative of a member. Based on the conversations we've shared, I chose to write fortunes that felt true to my understanding of what they want or are working toward. We are friends so, I wanted this page to be a small way of showing my support for them and expressing my hope that they achieve what they desire. But hehe they need to figure out which one represents theirs.
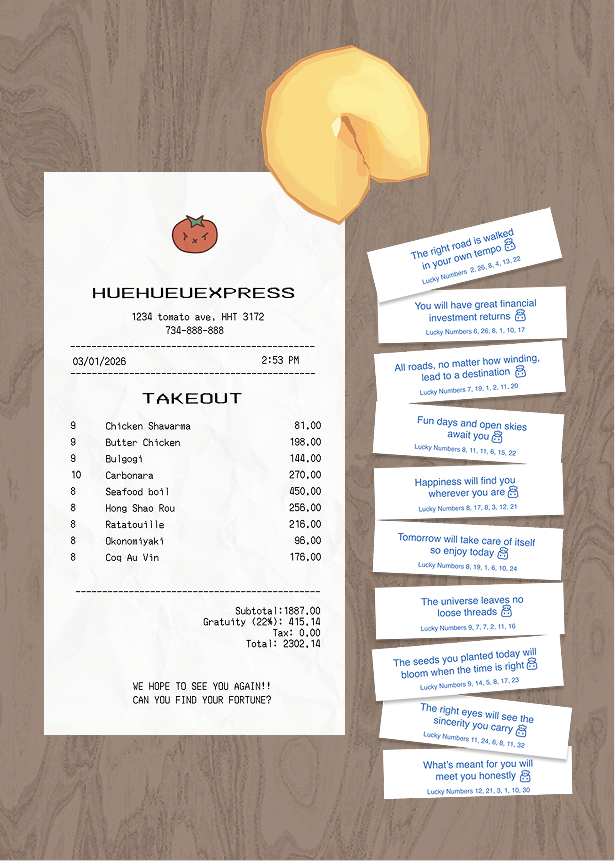
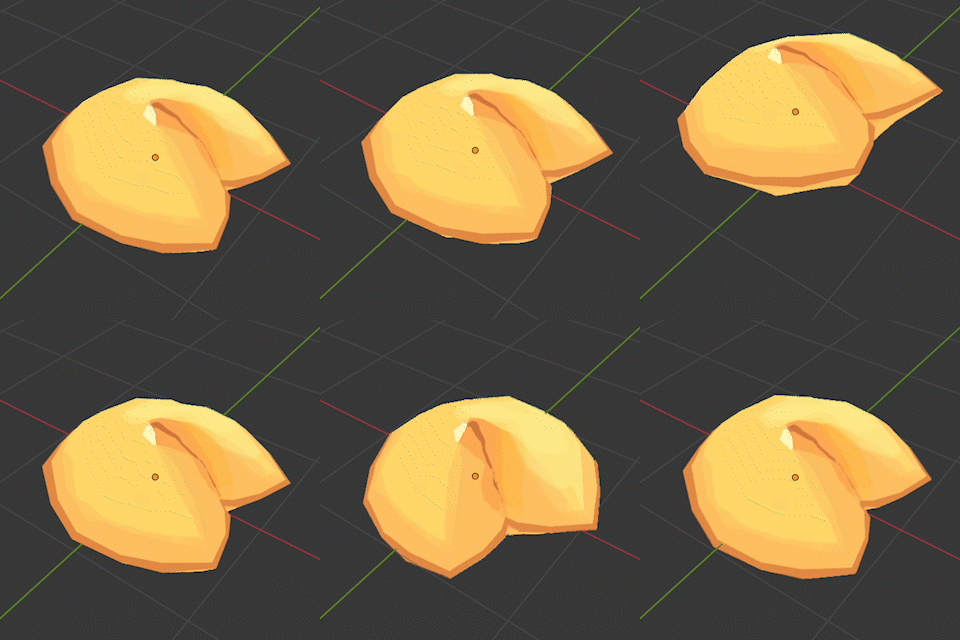
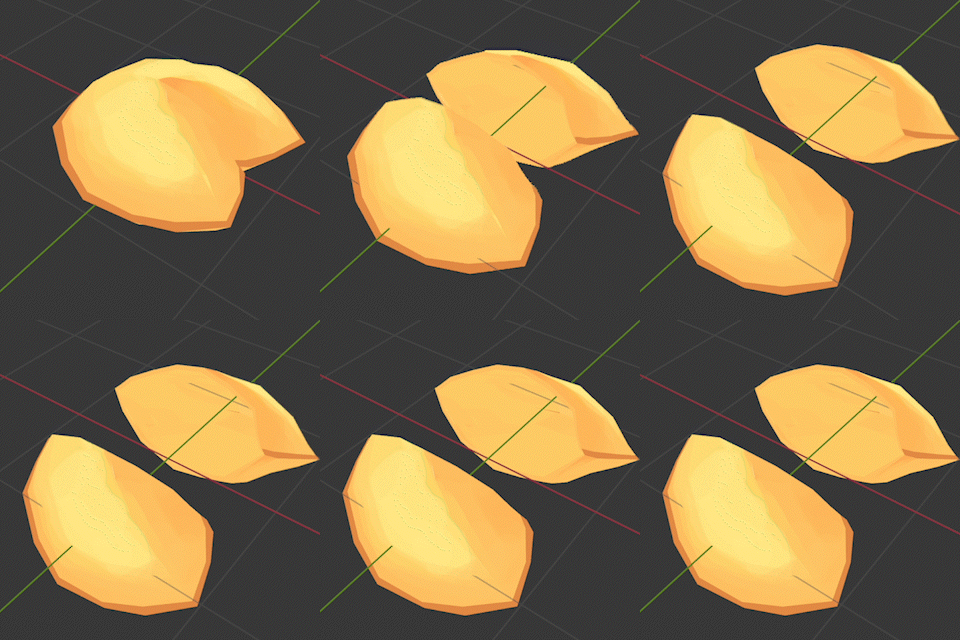
I originally wanted this to be an AR interactive page, where scanning a QR code would let you tap and break the fortune cookie. Unfortunately, after building it, Niantic shut down their 8th Wall. Even though the experience was already built, I didn’t want it to expire within a year. Still, at least here, I want to show off the fortune cookie I texture painted and animated by recreating techniques used in Cookie Run Kingdom!
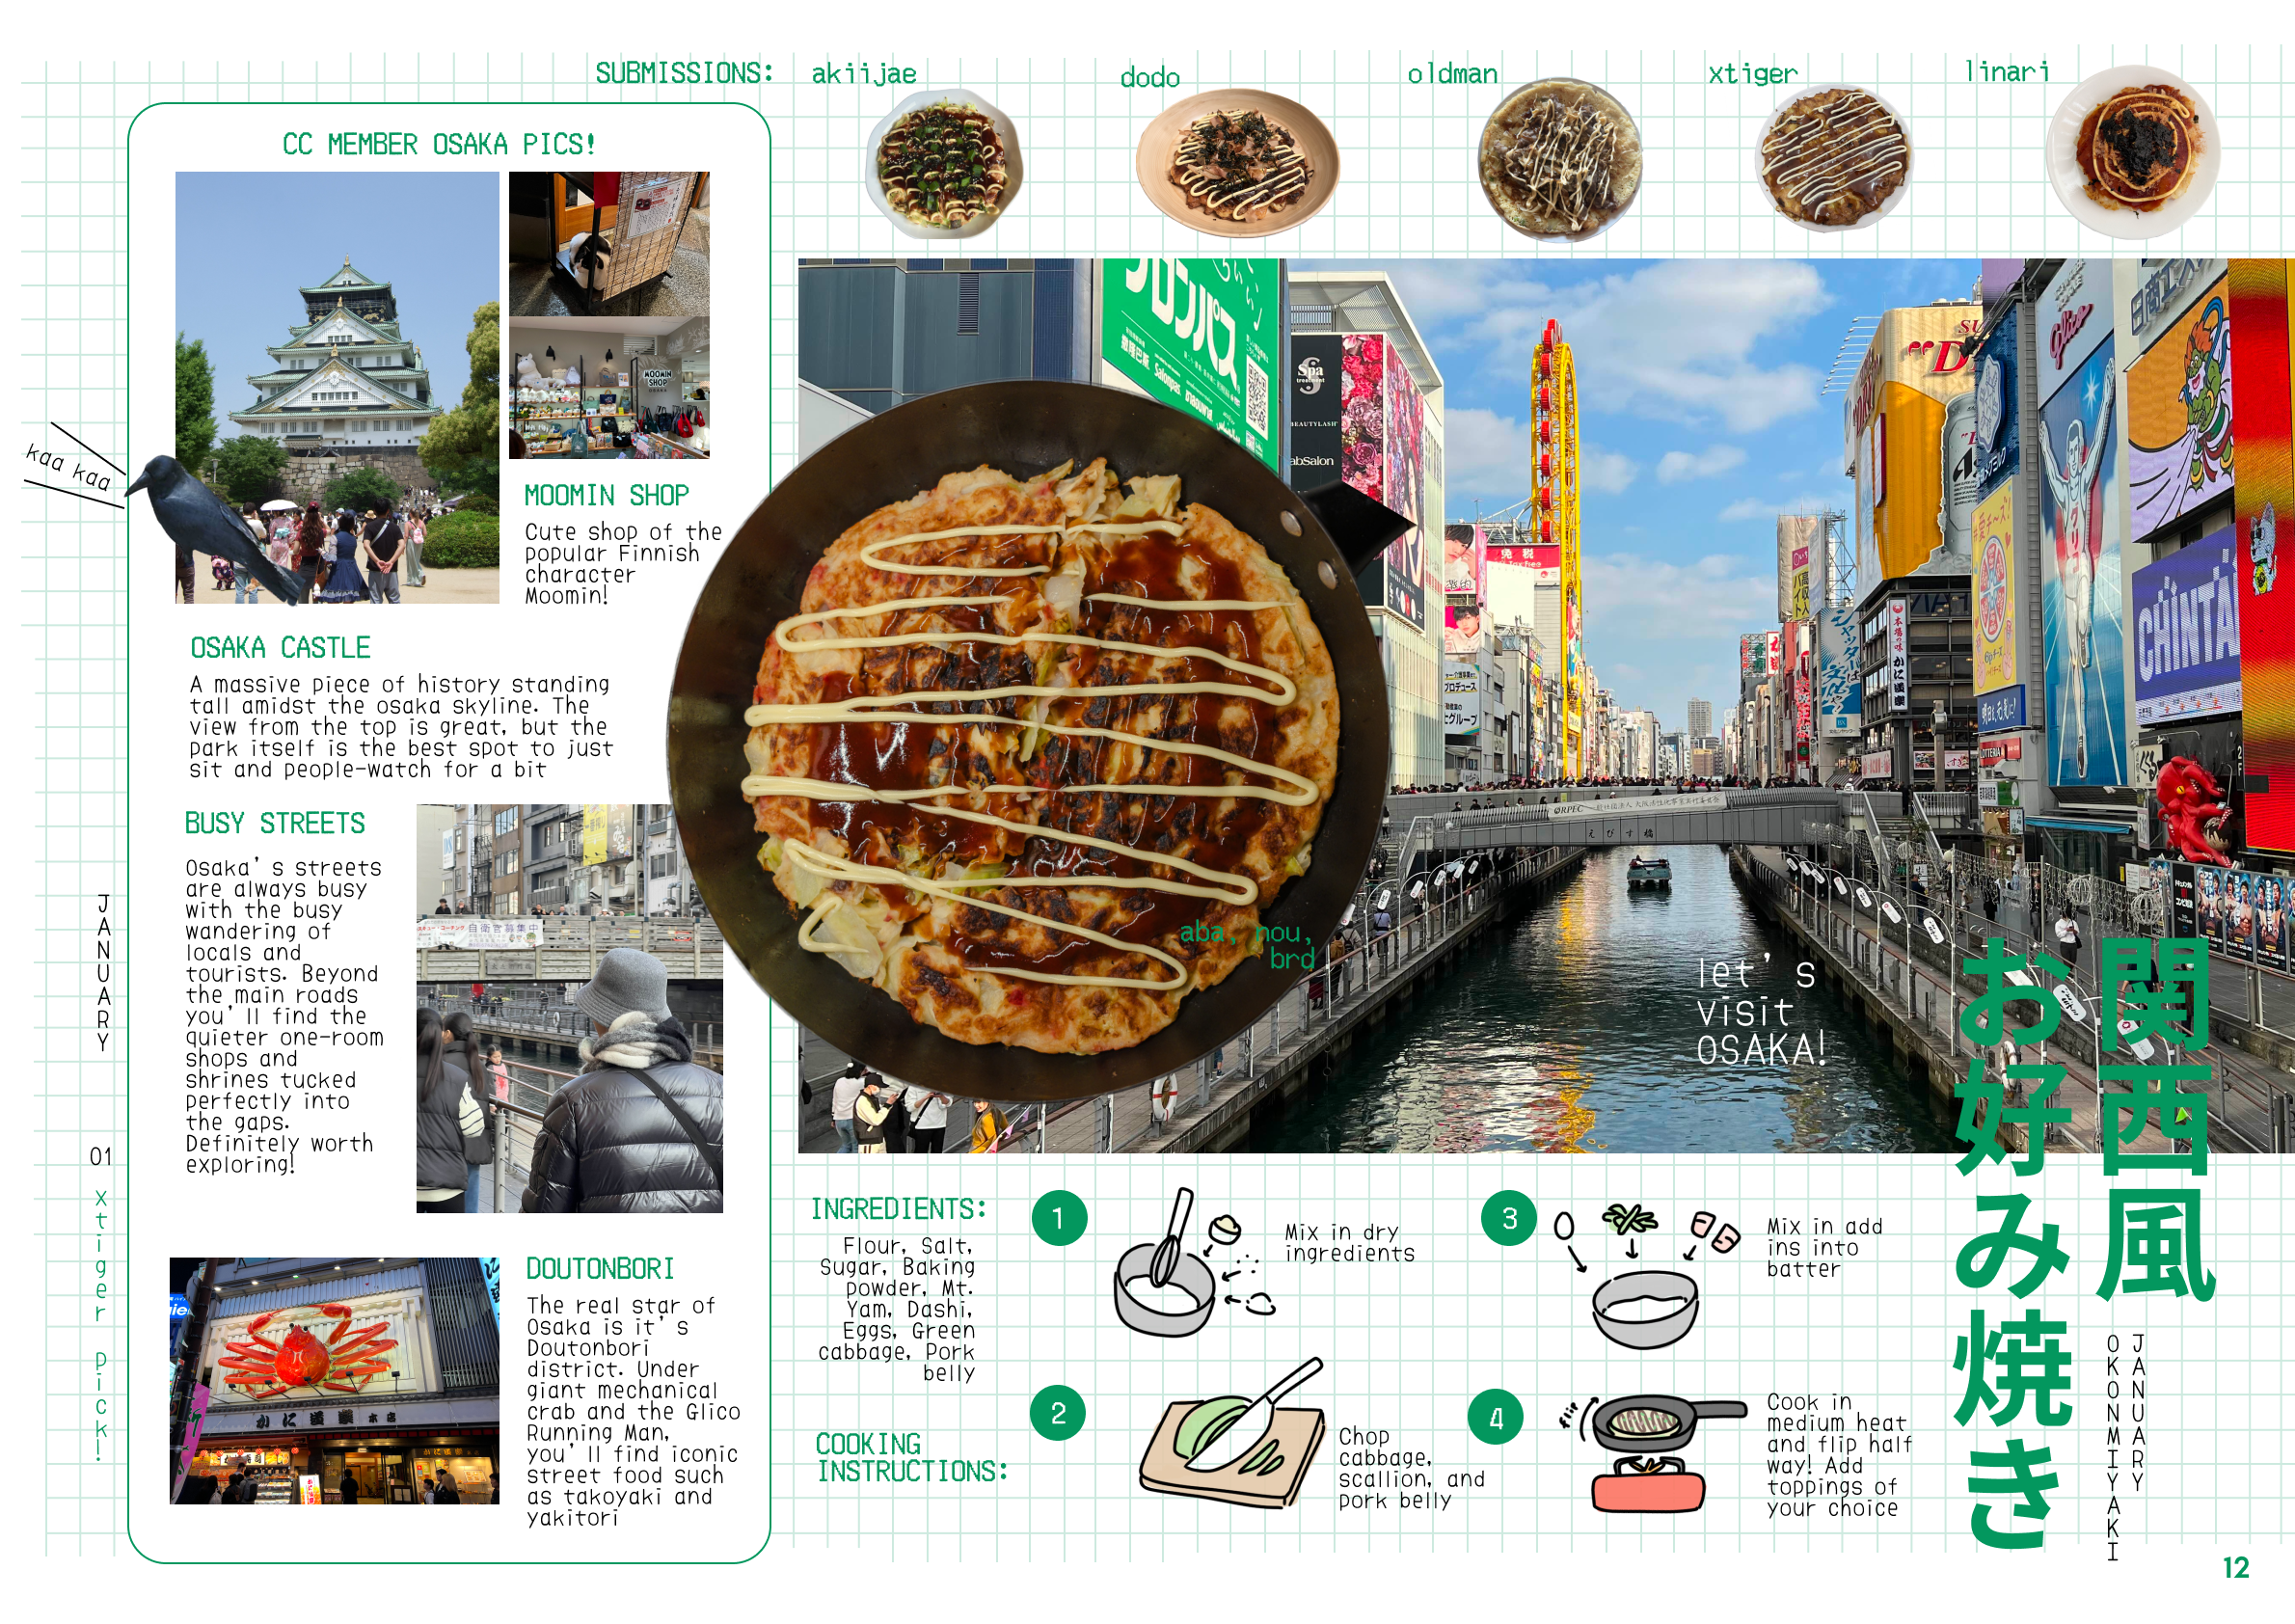
Overall for me, these monthly graphics were also a great way to explore different design patterns and study how graphics are made. Beyond typography choices, I started noticing how many layouts rely on consistent grids, repeated spacing, and visual hierarchy to create structure. It was really cool to recognize these patterns and understand how much intention goes into making layouts feel cohesive.
CC Intro Video: Memories of youth through food
One of my main goals for the magazine was to make it more interactive than a traditional print publication. I had already included QR codes and interactive articles, but I wanted to introduce something more unique that had some wow factor!
I was first introduced to NFC tags at AWE, Augmented World Expo, and the idea of tapping a physical sticker that linked to something digital really stuck with me. I wanted to apply that same principle to the magazine cover, allowing readers to interact with it by simply tapping their phone and accessing an additional layer of digital content.
For the embedded content, I wanted to create a video that captured the magazine’s overall tone, which, to me, centered on youth, friendship, and the connections we build through shared experiences. Cook club brings us together through cooking the same recipe, reacting to each other’s results, and sharing stories from our lives along the way. I wanted the video to reflect that sense of togetherness while exploring how food connects us to our memories and to one another.
Because everyone participating is Chinese or Chinese-American, we decided to write the script and record the voiceover in Chinese as a homage to our cultural background. With the help of two other members, we wrote a heartfelt script about the relationship between food, memory, and the experiences we carry with us. They did a really great job.
Thank you also to the member who filmed and edited the video I had envisioned. Given his photography background, I thought he would be a great fit for this part of the project, and he was! I'd also like to shoutout the member who recorded the voiceover, because she made the video feel so much more personal. Along with the other members who contributed in different ways, I’m incredibly thankful for everyone’s efforts in making this such an awesome result through group collaborative effort!
Please check out the video below!
And yes, I was able to embed the video into our magazine cover using NFC stickers and an NFC-writing app. The process was straightfroward and it was exciting to see the physical magazine have an extra layer that made it more unique!
Cooking Emilee!
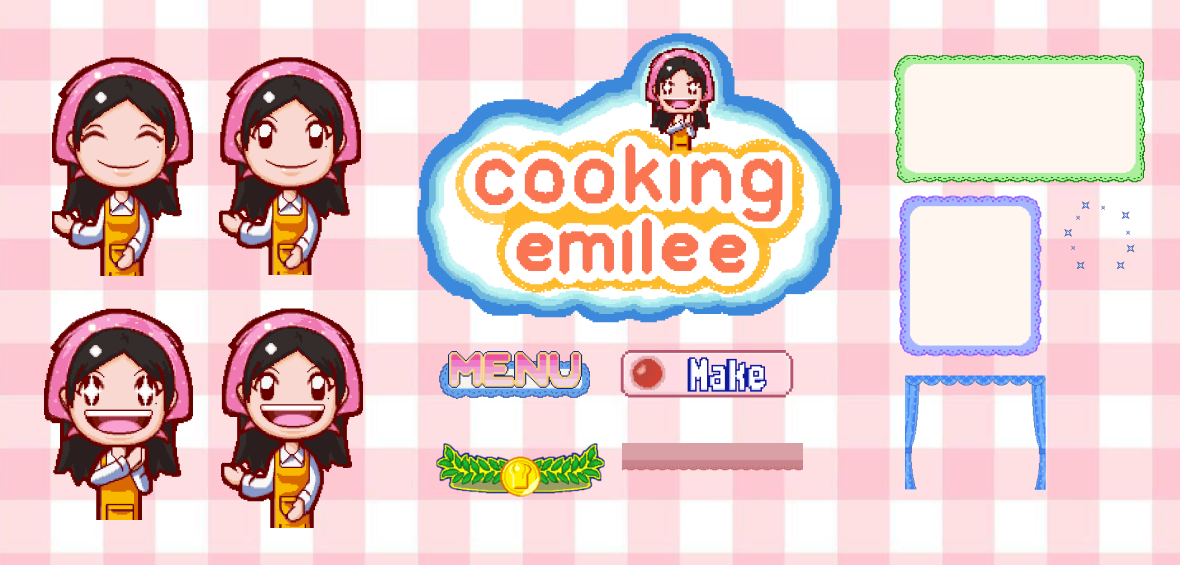
In the first month of our cook club, one member suggested making extra video content with the decided recipe of the month, chicken shawarma, and I thought it would be fun to try! After brainstorming, the idea I liked the most was recreating my own version of Cooking Mama. As a kid, it was probably one of my most played games, and when I started examining its design, I was surprised to discover extensive libraries of documented assets from old Nintendo DS games. These resources gave me a really helpful reference for how my video should look, complete with all of the SFX.
Surprisingly, this video took a lot more effort than I anticipated. Aside from using Aesprite to redraw myself as Mama, the documented assets that I thought I could directly user were sometimes incomplete or of low quality which made me spend extra time trying to clean them up.
Getting lighting right and also trying to capture everything in one take was much harder than it looks. Since my kitchen wasn't aesthetic, I set up a separate table with a pink plaid fabric I bought from Joann's to recreate the look of Cooking Mama. I positioned the table near the window and filmed at 1:00 PM to take advantage of the natural lighting. I also had to purchase a separate phone tripod and place it in front of me like I was hugging it to get a clean shot of me "cooking". I definitely retook shots more than I would like to admit so hopefully you don't catch the inconsistencies in the final video hehe. I really have a new found appreciation for food content creators! Please check out the video below:
Chef Cat and the Saja Boys
As part of creating some extra video content for July, I wanted something that would only take me a few hours to make since I was exhausted by the effort of the Cooking Emilee video. Honestly, there’s not much to say about this one. It’s meant to be silly and straightforward, and just an overall reflection of how trendy K-Pop Demon Hunters was during that time. The storyline is: the chef cat is making this month’s Butter Chicken, the Saja boys show up trying to steal its soul, and the cat fights them off and then completes the cooking. Please turn off your brain and watch it!
PPAP-Inspired Music Video
The day I left to go home for the holidays, I stumbled across a Chinese PPAP rap remix called PPAP2026 by TrickYzb featuring heavy 2000s-inspired outfits and visuals. The song itself was interesting, but the visuals really brought everything together, from the choice of clothing to the editing. The rapper looked so cool that I went back to rewatch the original PPAP video. I noticed that both videos mainly used a white background and clever editing, which made me feel like the style was something I could recreate myself.
Moreover, I thought it was a good way to give the magazine more depth by creating a new page centered around people through a food-related theme, rather than focusing solely on food itself. And I also thought it would be funny to surprise the other cook club members with something unexpected!
While waiting for my flight, I started drawing up a draft video inspired by the original and remix PPAP video and contacting the club members who were in Michigan over winter break, explaining my idea and asking about their interest. They were both down!
When recreating the early-2000s look, I had two options: 1) use an actual 2000s digicam, or 2) shoot high-quality footage and post-process. After testing my dad’s old Canon Powershot S95, I decided to go with my friend's DJI pocket 4K resolution option. The main factor was that although the battery life was long for the PowerShot, the camera tended to overheat after long usage which wasn’t ideal. And this proved to be the correct choice as the DJI gave me a lot more flexibility in post production, letting me control grain, motion blur, and color degradation. It was super satisfying to see my draft come to life when I was putting everything together in Adobe Premiere.
As for the video effects, for the pen and pineapple, I ended up finding free models online, rigging, and rendering images out in Blender, and bringing them into the editing software. One thing I actually overlooked was the pineapple landing in the first shots. If I could re-edit it, I’d make it more dynamic as it currently lacks depth and just looks like a PNG dropped in. A bit of movement would have made it feel more real.
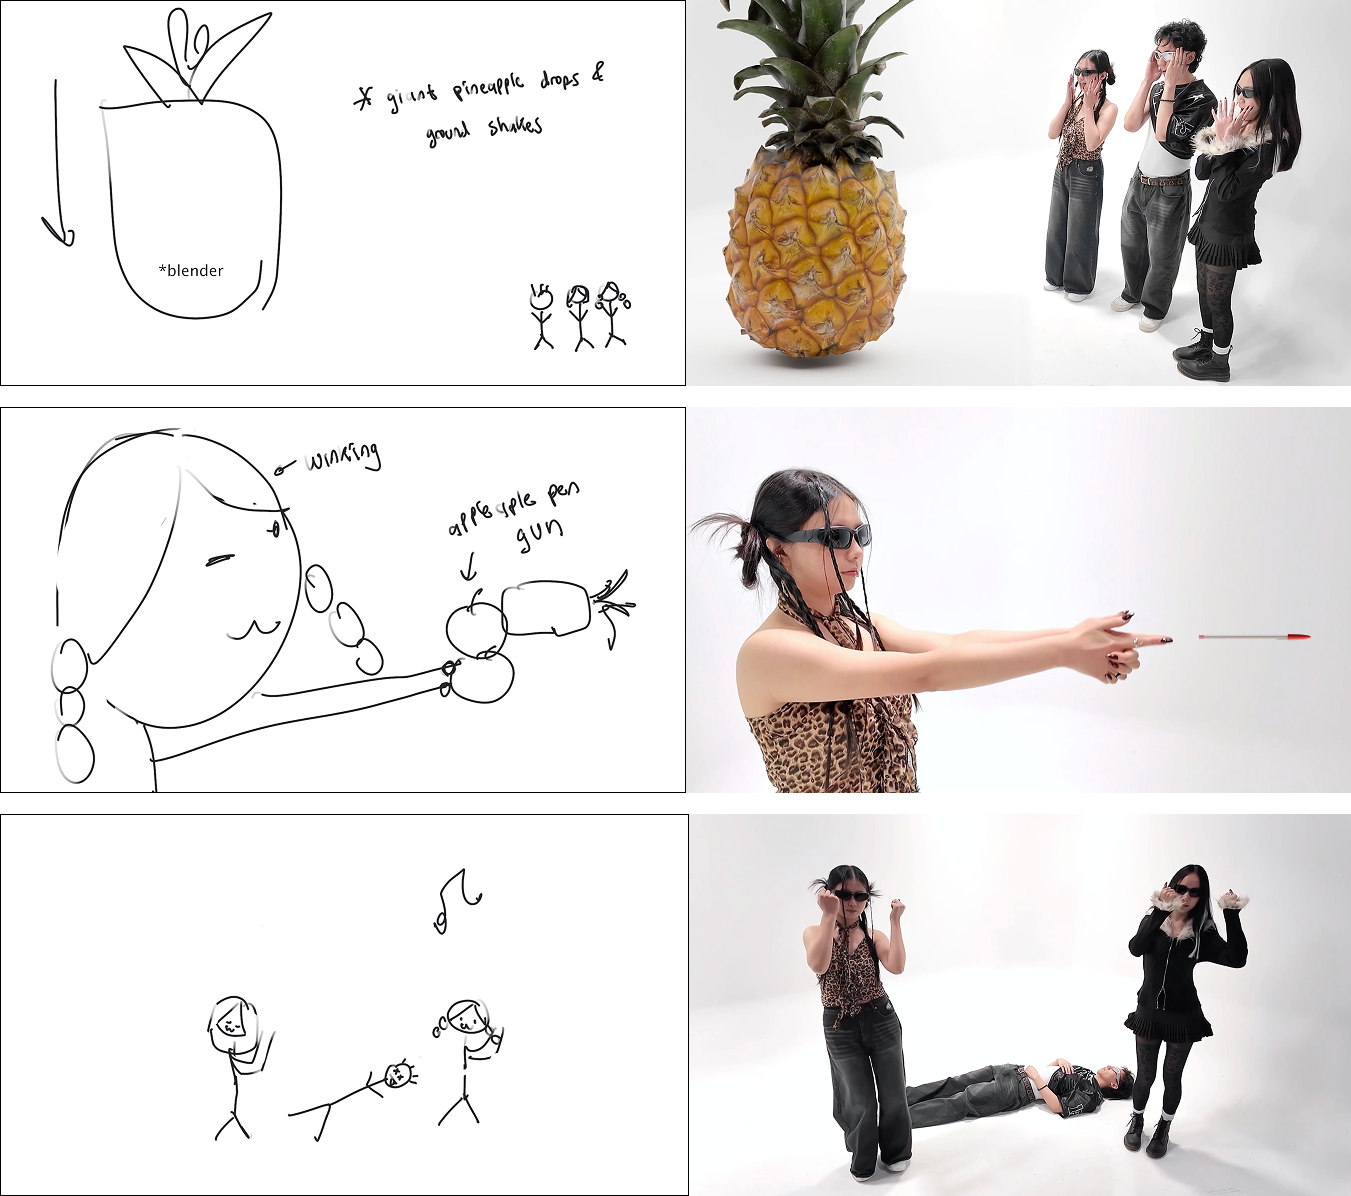
All in all, the part I found the hardest was how quickly we had to move. Since I would only be back for two weeks, we had to find availability, decide styling and buy all of our clothing, consider holiday shipping, finalize the video planning, and book a suitable studio.
Huge thanks to my friends for being such good sports that day! We spent about three hours driving from place to place, filming the entire time, and I had so much fun making these memories. I’m not getting any younger (I’m hitting my mid-twenties!!!), and it’s really nice to have photos and videos to look back on.
CC Member Intro Video: Learning Blender Rigging and Animation
I felt like everything was coming together for the cook club magazine, but one thing I thought was lacking was all of us being visually together. With ten people, it’s pretty much impossible for everyone to be in the same place at the same time, so I started thinking of creating a video as a way to bridge that gap. I wanted to make the group feel more connected during our last cooking stretch, and also express how grateful I am for everyone working on this large project with me.
The visual basis for this video started forming when I came across a video by Korean artist, Dolman, called HELLO⁂SODADADA. I was immediately drawn to its bright, cheerful energy and the idea of characters dancing in front of food. I especially loved the concept of each person representing an ingredient, which helped the video storyline come together pretty naturally.
The first thing I did was study Dolman’s drawing style to draw character representations of everyone and also picking which ingredient they represent. The character designs I came up with combine the colors of each person's main ingredient with their real-life appearance.
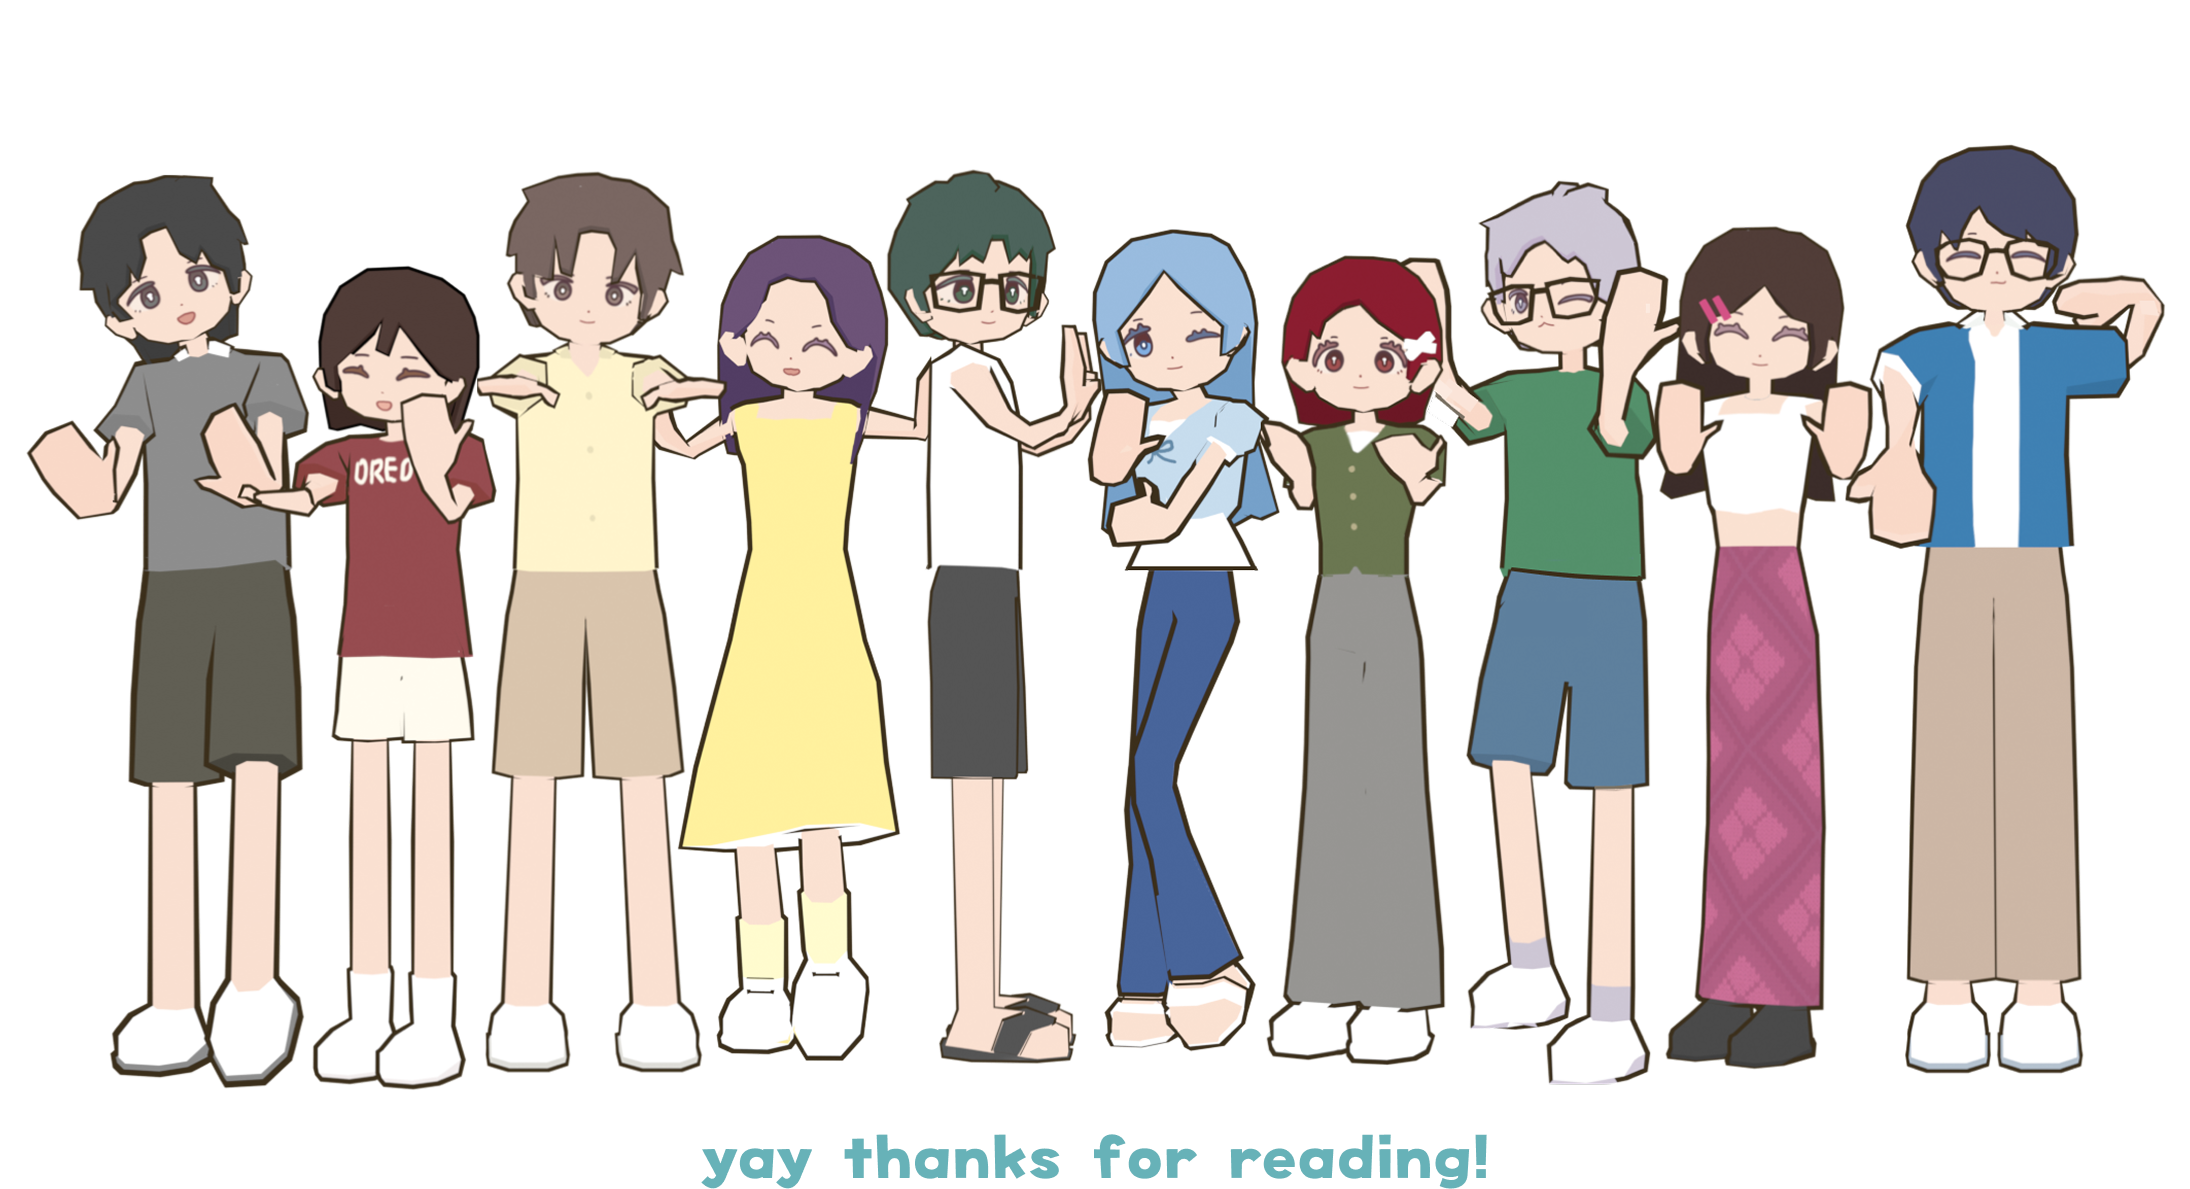
The video follows the start of a new month, with a new recipe announced by Huehuebot. From there, we go grocery shopping for ingredients in the beautiful oceanside town we all live in, in our 10 person car. The choreography is broken into short sections during the grocery shopping phase, and afterward, we cook together, with some success and some failure. I also designed the video ending to end in a way that emphasized our friendship and the feeling of us as a group!
As for the dance, I referenced a video by パオパオチャンネル, where they danced to “KOI” by Gen Hoshino—a video I first watched almost nine years ago. I remember thinking the choreography looked so fun and wishing I could recreate it one day. It’s pretty cool that I finally got to follow through on that thought almost a decade later!
One key difference from HELLO⁂SODADADA was that I knew it was impossible for me to fully animate and illustrate everything myself, especially since my illustration skills aren’t that strong, and doing this for ten characters would’ve been kind of crazy. Instead, I wanted to use 3D models and rigging to achieve a similar effect.
Since I started self-learning Blender around four years ago, I’ve mostly stayed in the modeling and texturing phase. Rigging and animation were always the parts I skipped and defaulted to Adobe Mixamo. This time, though, I wanted to properly sit down and learn these processes for real.This process ended up taking way longer than I expected (a common theme for this project haha). I originally thought this video would take two months, but it probably took closer to four.
Working on this project pushed me to think about Blender in a much more technical way than I had before. Because I was working with so many characters, I used a shared base mesh to keep things manageable, adjusting proportions as needed for each model. I also relied on Rigify’s base humanoid rig and simplifying it for the base, but the low-poly nature of my meshes made me much more aware of the rig’s limitations once animation was involved.
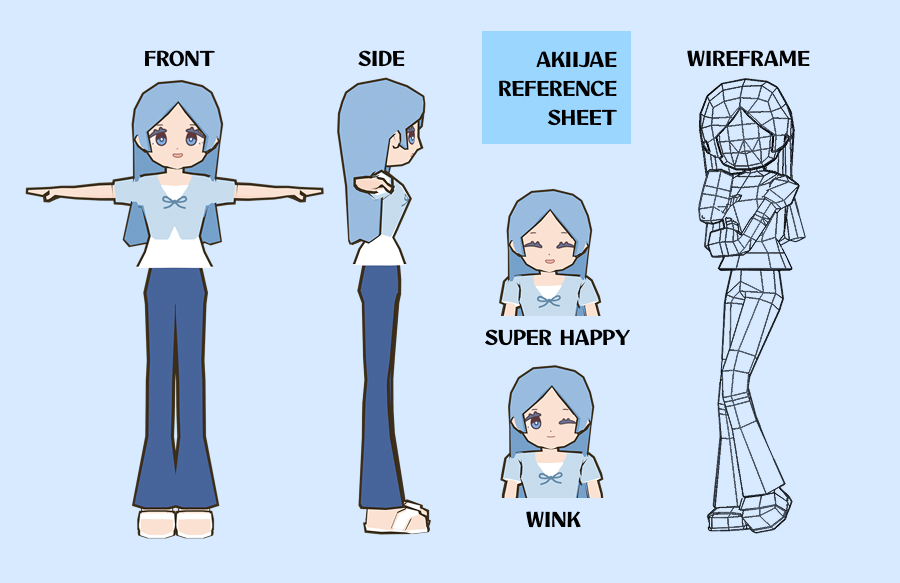
Topology became way more important than I expected. I had to pay close attention to edge flow around joints like the shoulders, elbows, and hips. Adding and adjusting loop cuts made a direct difference in how cleanly the mesh deformed during movement. Weight painting was easily the most time-consuming (and frustrating) part of the process, and I couldn’t rely entirely on automatic transfers. Throughout this process, the weight painting visualization tool ended up being incredibly helpful for understanding how each bone affected the mesh, especially when troubleshooting issues like shoulder deformation during arm lifts.
For animation, I think the best way is to work in short sections rather than trying to tackle everything at once. Blocking out key poses first and then refining smaller movements, transitions, and timing made the choreography feel much more manageable. Managing everything in a single Blender file also forced me to stay organized. For example, it was a lot more importnat for me to use collections, shared assets, and consistent naming to keep the scene from becoming overwhelming.
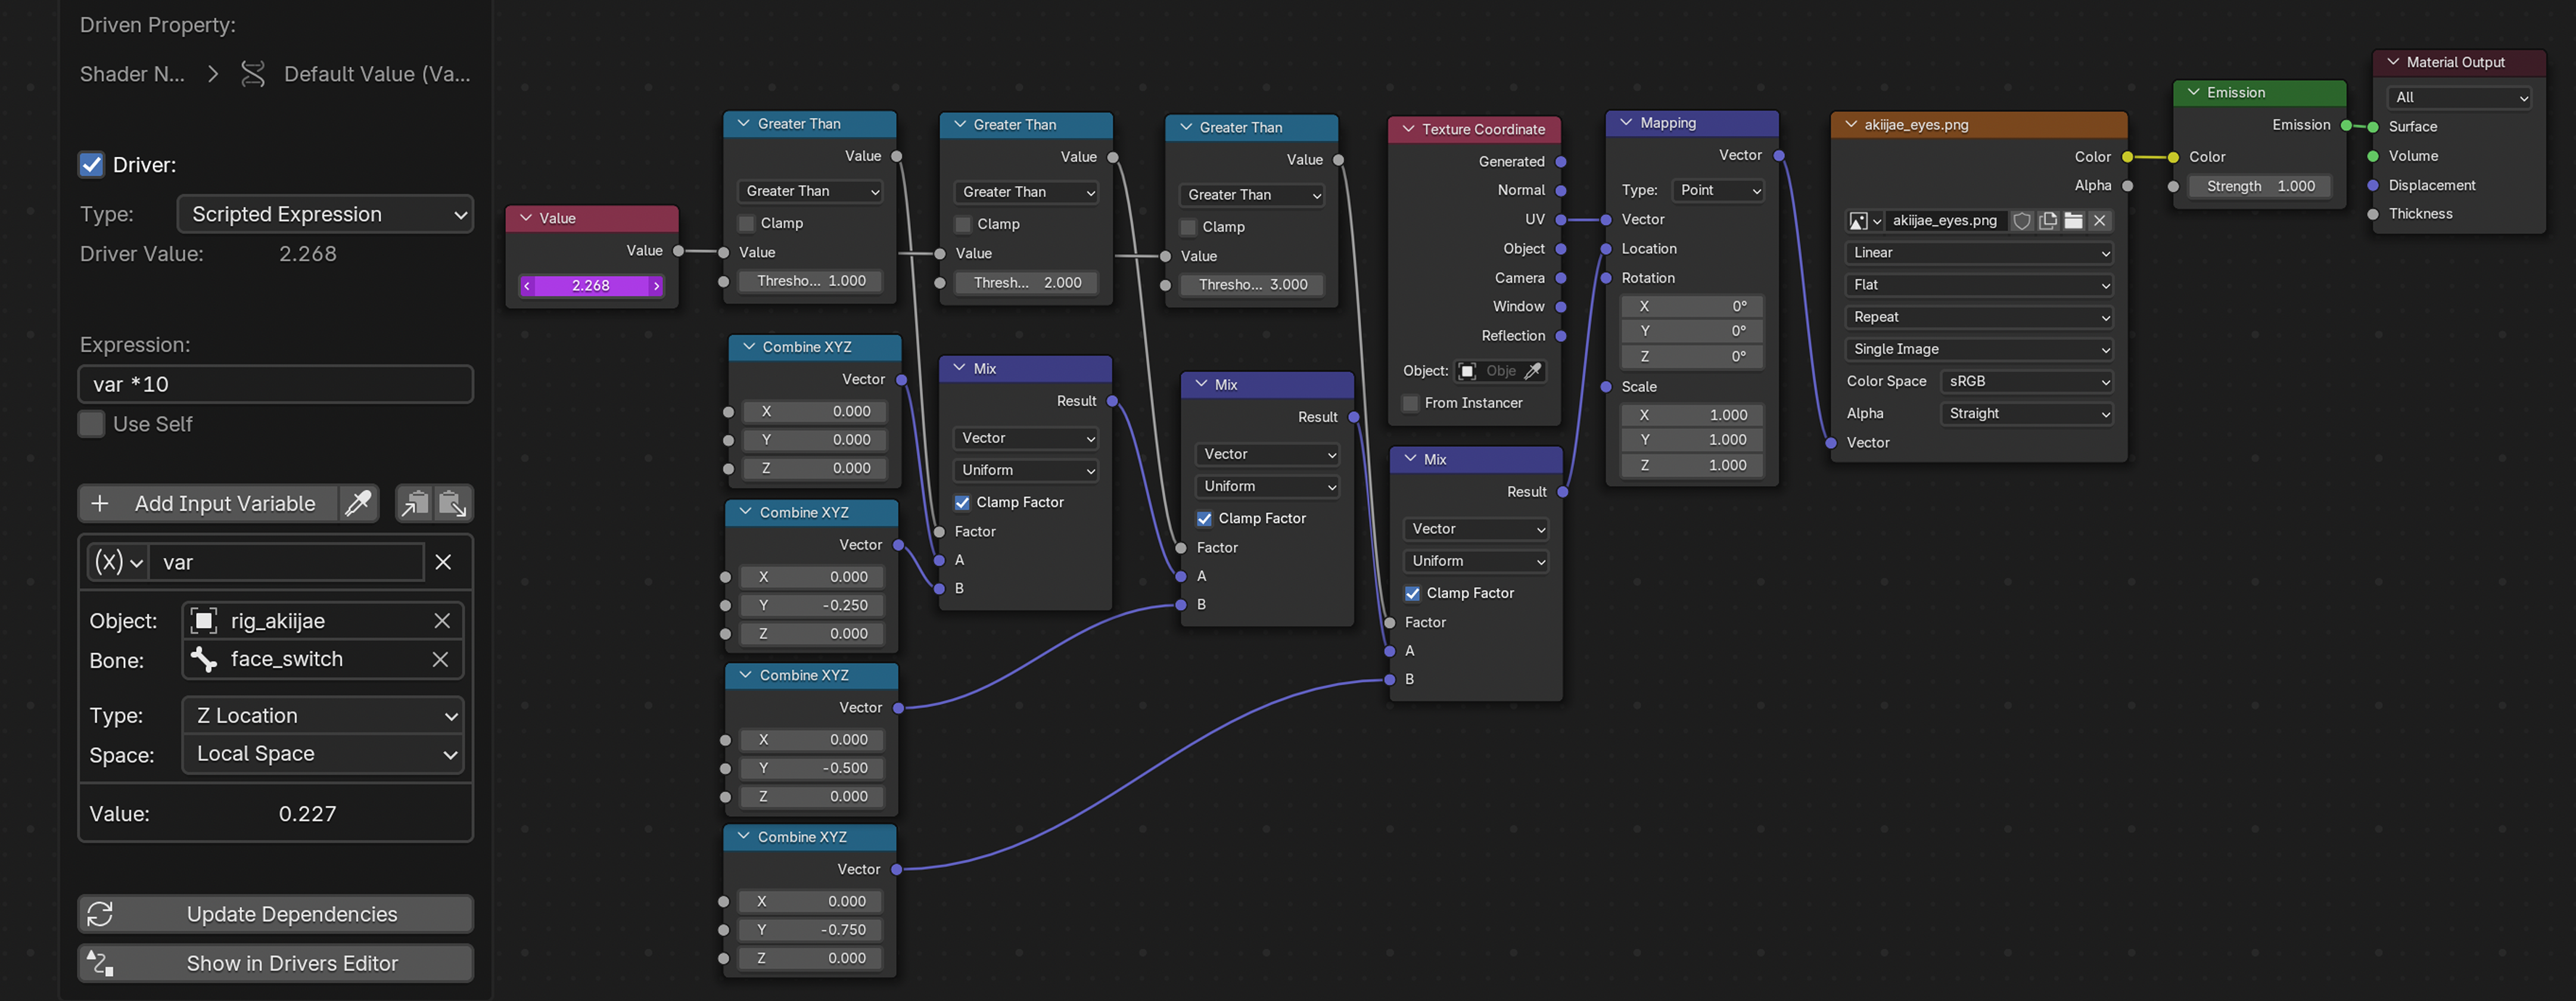
In regard to animation, one of the cooler techniques I ended up using was UV texture animation for the face! I really liked how it helped a flat, illustrated aesthetic similar to the visual style of games like Animal Crossing where it's based on texture-driven expression changes rather than geometric facial deformation!
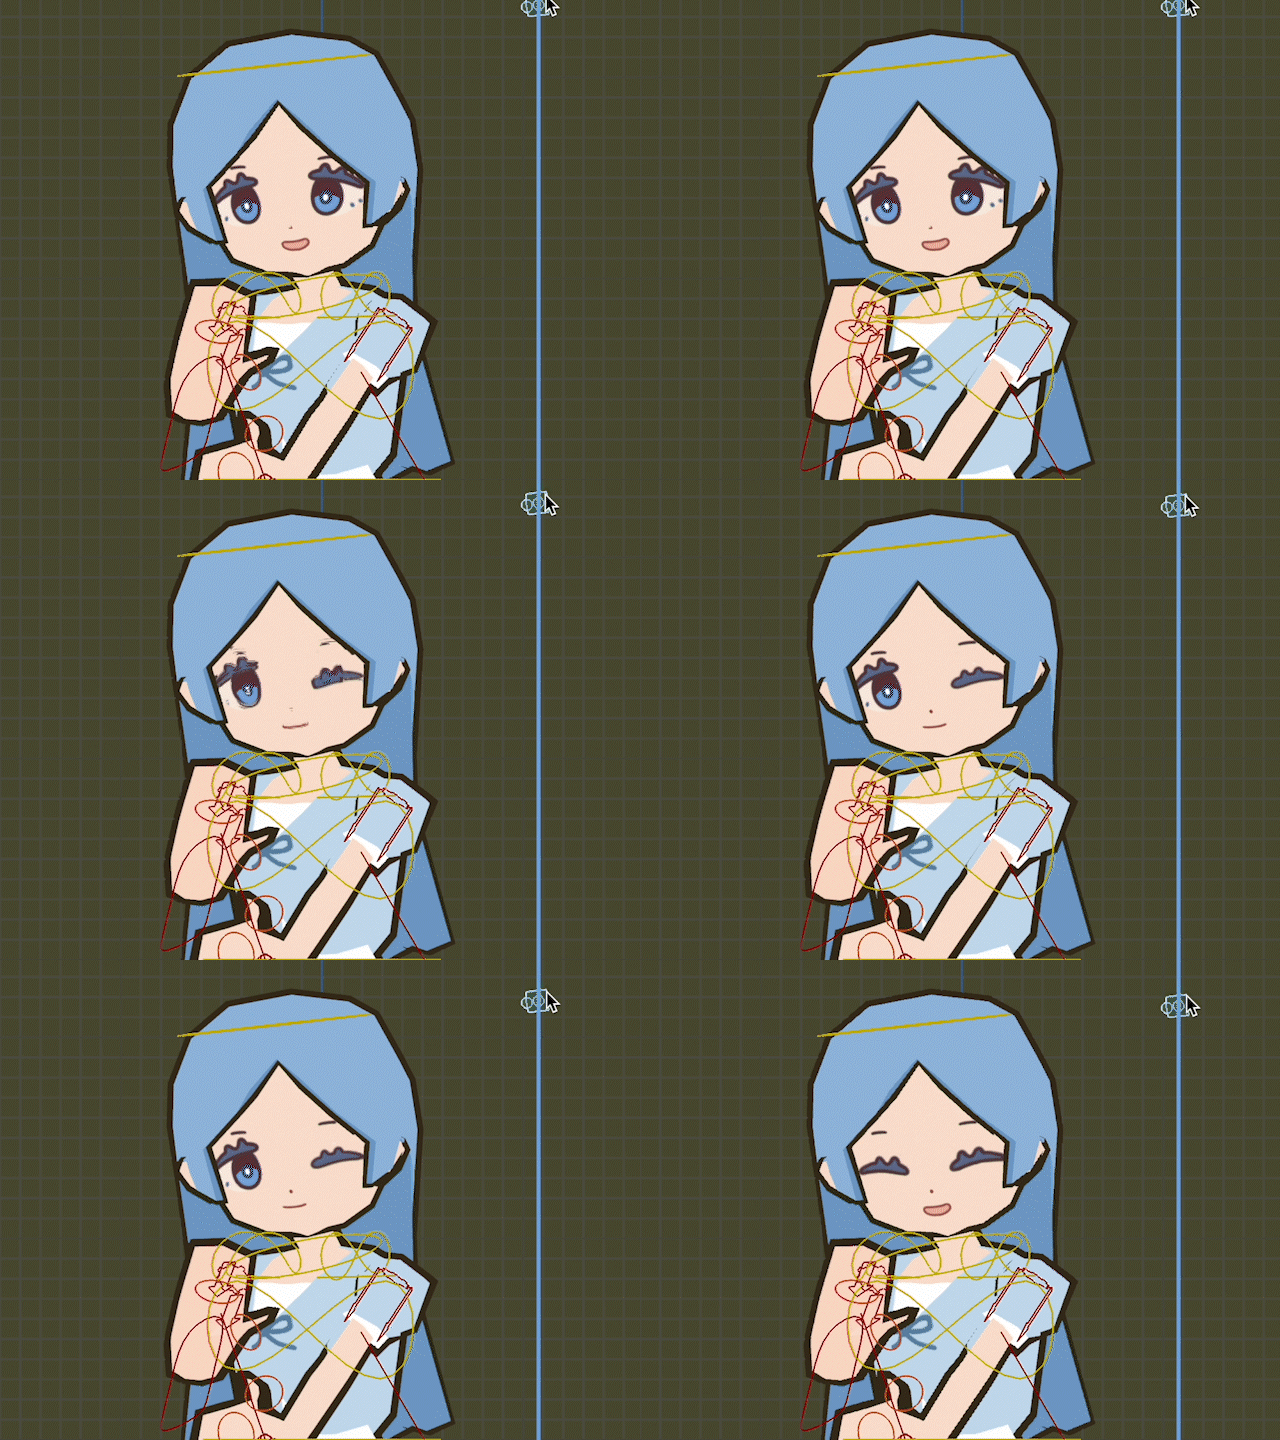
And the node material setup in case anyone is curious:
I also highly recommend not drawing directly in Blender. Exporting textures to Procreate and re-importing them into Blender allowed for increased control than painting directly in-program, especially for preserving resolution and organic line quality.
Looking back, there are definitely areas I’d want to refine further, especially around weight painting and joint behavior. I didn’t have time to add twist bones this time, but this whole project made me much more interested in how joint structure, loop cuts, and topology work together to create smoother rotations. I'm happy I got to do this project which forced me to learn Blender animation and make these systems feel far less intimidating. Moving forward, I’d really like to try creating a high-poly model and fully rigging it myself sometime this year, since I think it would be really beneficial for my technical understanding of Blender!
Bringing Everything Together using Adobe Premiere Pro and After Effects
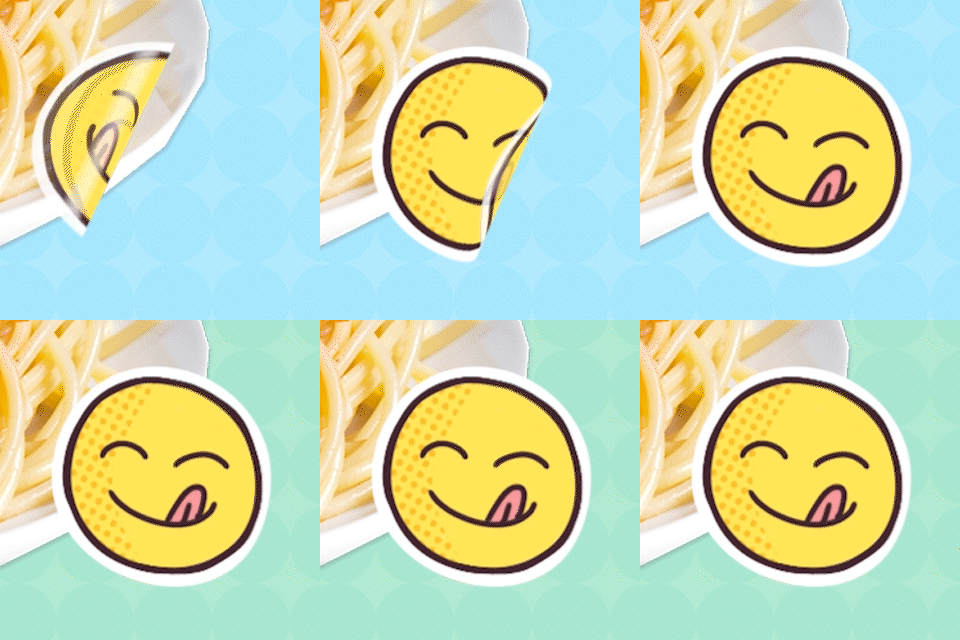
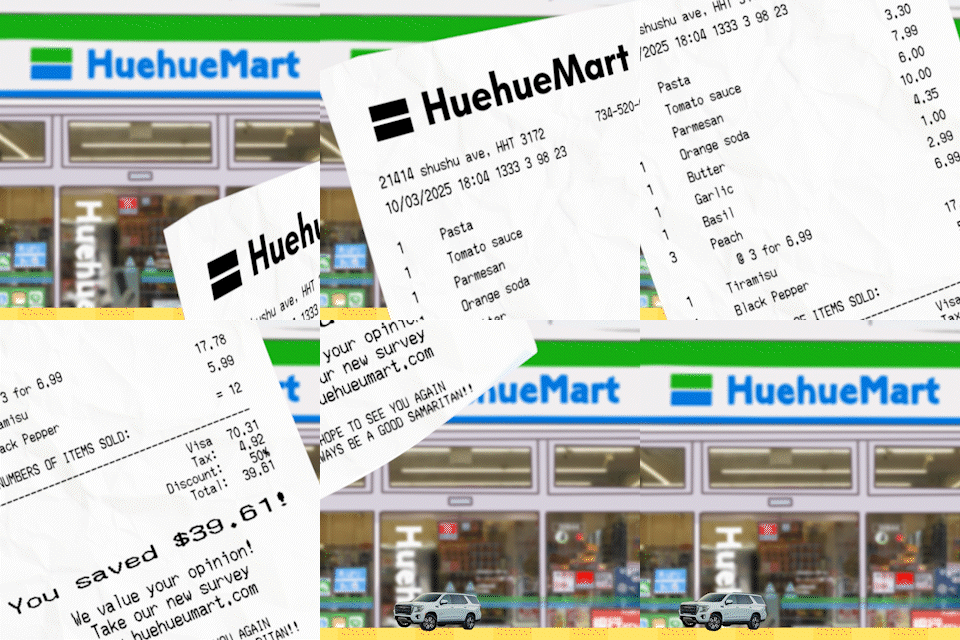
Beyond the character animation itself, it was a unique challenge to bring together 2D illustrations, 3D rigged characters, and real food images into one cohesive moving full video. Some of my favorite After Effects details I created include the sticker applying effect and a 3D receipt flying across the screen:
Please watch the video below!
Magazine Printing, Custom Merch Add-ons, Packaging and Mailing
Now the final most fun part of the whole club! Ordering the physical products and mailing it to everyone!
For magazine printing, after doing some research I ended up using Mixam! I actually highly recommend them (not sponsored). I thought their potal was very easy to use and their AI chatbot was quite helpful in helping me decide what type of paper to go with. If you're curious of the settings I used, I printed this magazine with: A4 paper, staple binding (so the magazine can lie flat to better see double page graphics), full color printing, 44 pages long, 80lb satin text. The end product really felt like a professional magazine, and the paper was smooth to touch. For 10 copies, it ended up being $77.50 and around ~$10 dollars in shipping. I would say that's a pretty good deal!
What I appreciated the most about Mixam is that once you upload your file, they will also hand-check it for margins and possible printing issues. I actually got flagged the first time and had to move my page numbers a little further inside the border.
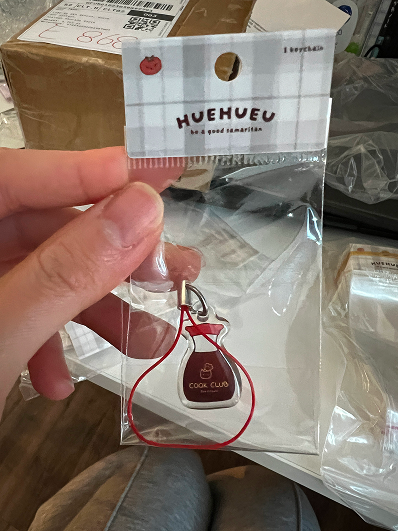
For package add ons, I had designed and ordered double sided epoxy keychains with the cook club cat on a soy sauce bottle using Vograce, a popular print on demand service. The keychains ended up costing $20.74 for 10, and I spent an additional $5 on 50 custom keychain backing cards. I was lucky to catch the Thanksgiving deals when I placed my order! I would also highly recommend their business (not sponsored), as they were quick to respond to any concerns I had.
The next add-on, which I unfortunately don't have pictures of, is creating custom fridge food magnets for club members. Because I don't have exeprience, I delegated this to another member who was skilled in clay modeling and painting, and surveyed the group for their favorite foods. The magnets she created turned out really cute! I liked how they added another layer of personalization to each package.
For the A4 literature mailers, I did a lot of research to find ones that were sturdy but still looked sleek. I don't know why, but I'm really picky about how cardboard boxes look. There's just something about receiving a nice, sleek, brown cardboard box that's thin but sturdy that makes me think, "Wow, nice box!" But yeah haha, I ended up ordering one from Amazon, which unfortunately was only sold in packs of 50.
They arrived in great condition, and I was happy with how much structure they had. I'd link them here as a recommendation, but the listing is no longer available. I think as long as you find one with good ratings, you should be good!
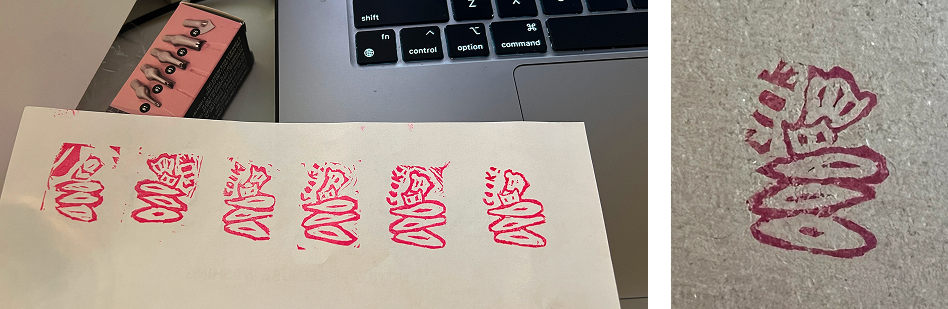
Lastly, I wanted to make the A4 literature mailers a bit cooler by adding a custom stamp. Since buying a customized stamp can be a little expensive, I decided to get a small stamp carving kit instead and carve it myself. Mm, it definitely takes some practice! Getting fine details right can be quite difficult and it probably took me around three hours to get a result I was happy with.
This was all a lot of work, folding the literature mailer, sticking the scanned nfc tag onto the magazine, wrapping the magnets, wrapping the magazine, putting in the keychain, writing a custom message, and sealing the package. I realize I am not cut out for repetitive manual tasks :D
Final Thoughts
I’m really happy with how everything turned out. Collaborating with friends on different projects felt especially meaningful, as it allowed everyone’s individual strengths while also adding depth. More than anything, it gave us a shared goal, giving us more reason to stay connected, and something new to talk about. I think that is essential to maintaining and strengthening friendships especially in adulthood.
Gosh, this was such a long article! I hope it was interesting to see the things I made for this project! 💛